Installing the Facebook Developer Application
The first step in creating an application in Facebok is to install the Facebook Developer application.
To do that, log in to Facebook and then visit the URL http://facebook.com/developers.
If this is the first time you’ve installed the Developer Application, you will see the Request for Permission dialog show below:
Click the Allow button to proceed.
Creating the Facebook Application for your Website
Now that you have the Developer App installed, click on the Create New App button.
Click the Allow button to proceed.
Creating the Facebook Application for your Website
Now that you have the Developer App installed, click on the Create New App button.
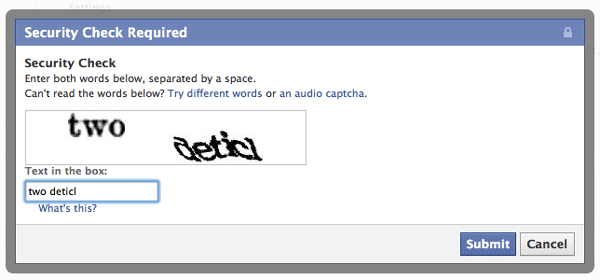
On the next screen, enter the security phrase and then click Submit.
There are a lot of options you can tweak related to your application. In this post, we are going to focus on the basics needed to get your website set up with a Facebook App ID.
The Settings Tab
This is where you do the basic set up for your app.
For the purposes of this tutorial, you need to concern yourself only with the Basic Settings which will suffice for setting up your website as an application to get an App ID.
OK, there’s your App ID! You’re almost there. Your App ID is the value you’ll be using to integrate your website with Facebook’s APIs so you can add the Social Plugins (Like Button, Send Button, Comments Box, etc.).
For the purposes of this tutorial, you won’t need your “App Secret” value.
Second, notice the “edit icon” below the App Secret. You don’t need to add an icon. If your website has a favicon, it will be displayed next to your site’s URL in Facebook Insights.
Basic info:
- App Display Name: Make this the same as the original value you provided;
- App Namespace: Leave blank;
- Contact Email: Where you want Facebook to send emails regarding your app;
- App Domain: just put “mydomain.com” where “mydomain.com” is your website’s domain URL (TLD);
- Category: Select a category from the pulldown list (optional).
Cloud services
This is not applicable for a “website” Facebook application.
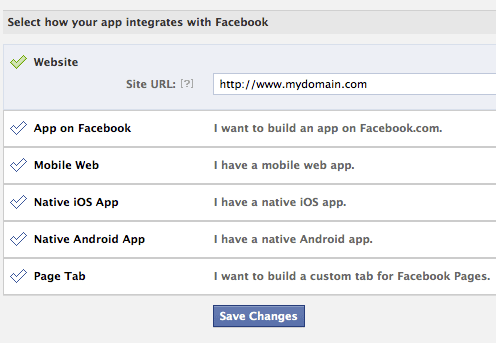
Select how your App integrates with Facebook
It’s here where you tell Facebook that your App is a website or blog.
Once you’ve filled in your website or blog URL, click the “Save Changes” button and you’re done!
Now you are ready use Facebook import feature to allow customers to order photos from Facebook album photos.


